Master Homemade Herb Butter: Easy Steps & Flavor Secrets
Few culinary tricks offer such a profound flavor boost with so little effort as homemade herb butter. Also known by its more sophisticated name, "compound butter," this simple concoction transforms everyday ingredients into gourmet delights. Imagine a dollop melting over a perfectly seared steak, infusing roasted vegetables with aromatic goodness, or elevating a simple piece of toast to an extraordinary experience. Mastering herb butter is not just about mixing ingredients; it's about unlocking a world of flavor that will impress your guests and bring new life to your favorite dishes.
What is Herb Butter and Why Should You Make It?
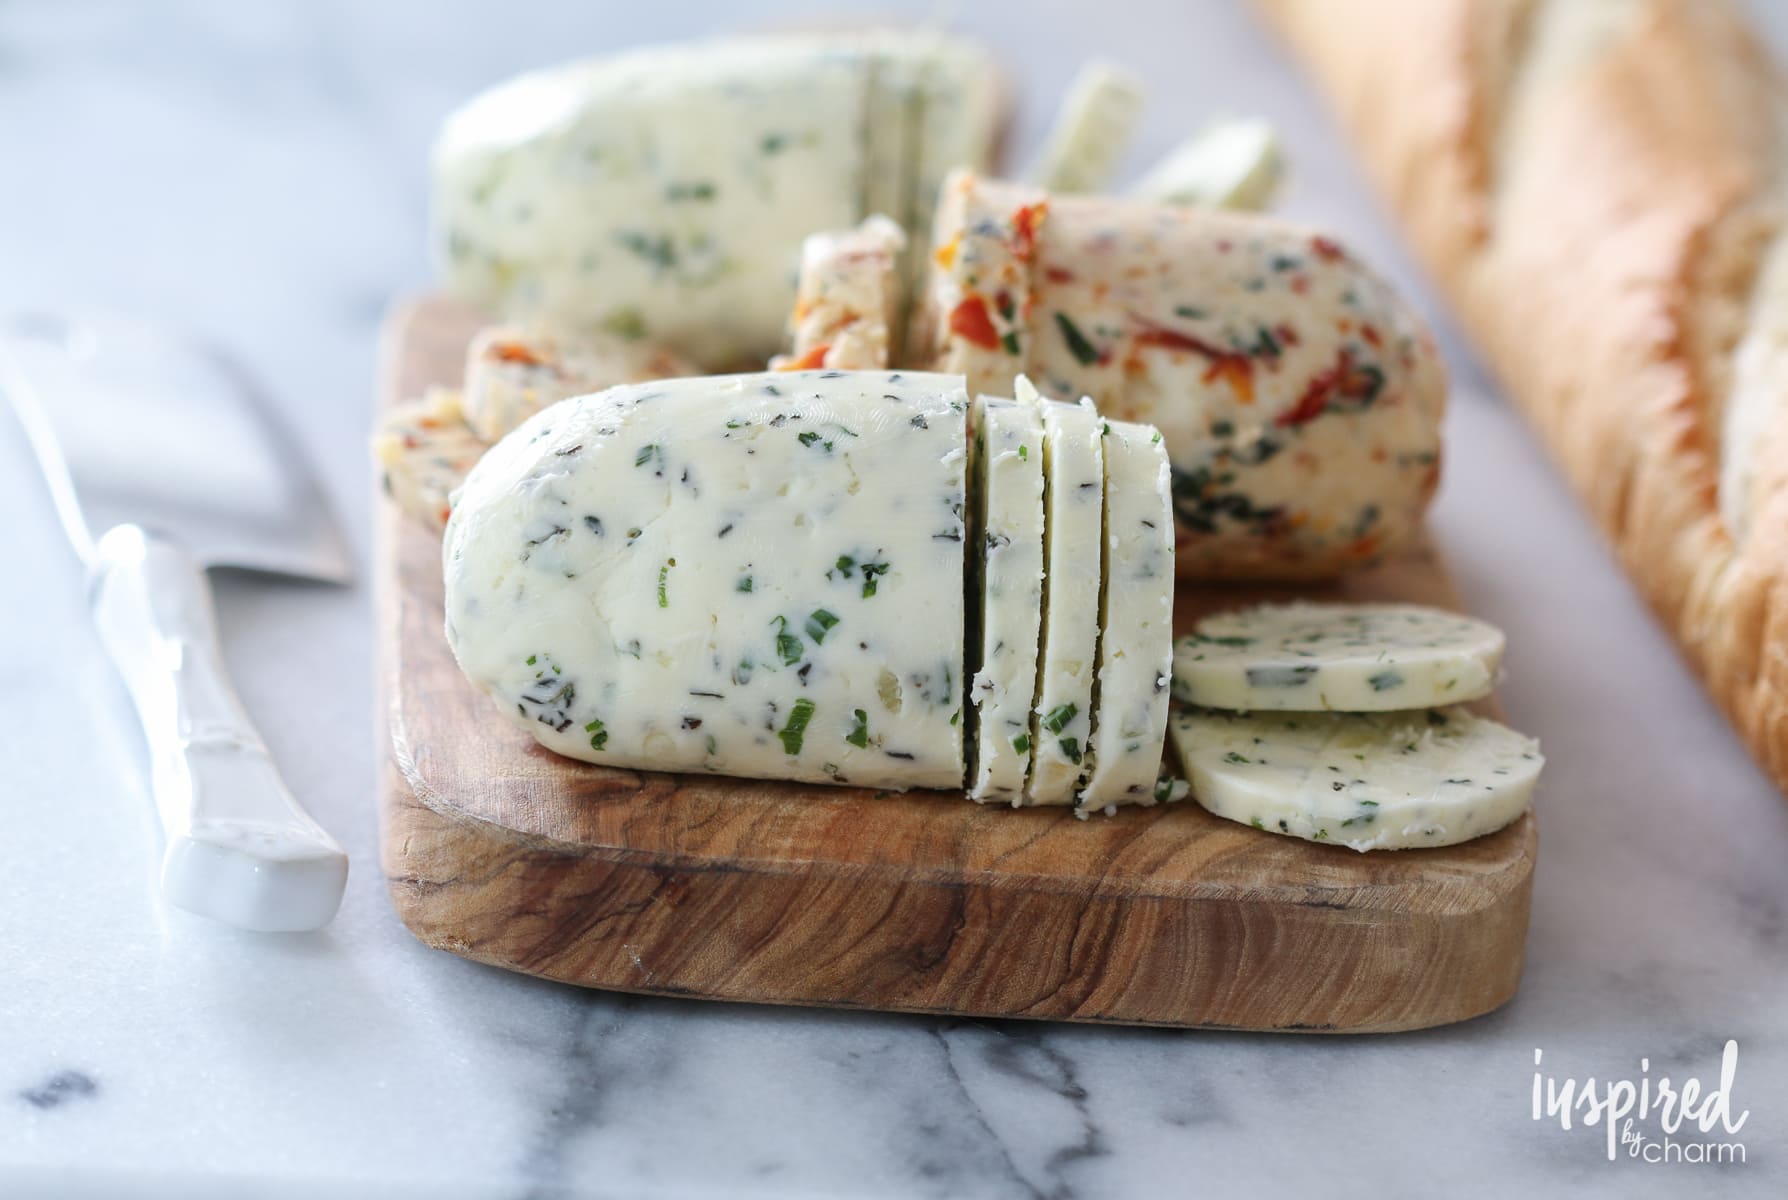
At its heart, herb butter is simply butter that has been softened and then thoroughly mixed with fresh or dried herbs, and often other aromatics like garlic, shallots, or lemon zest. Once combined, it's typically reshaped and chilled until firm, ready to be sliced into individual pats or spread.
The "why" is even more compelling than the "what":
*
Instant Flavor Elevation: Herb butter punches up the taste of virtually any savory dish. It's a quick way to add richness, aroma, and complexity that plain butter simply can't match.
*
Versatility Unmatched: From grilled meats and seafood to roasted vegetables, corn on the cob, or even mashed potatoes, the applications are endless. It's the ultimate secret weapon for home cooks looking to enhance their culinary repertoire.
*
Effortless Elegance: Serving beautifully molded or sliced pats of homemade herb butter adds an immediate touch of sophistication to any meal, making even a casual dinner feel special.
*
Customization is King: The beauty of making your own is the complete control over flavor profiles. You can tailor your herb butter to perfectly complement a specific dish or dietary preference.
*
Perfect for Gifting: A beautifully wrapped log of homemade herb butter makes a thoughtful and impressive gift for any food lover.
Think of it as a special condiment, a secret weapon in your culinary arsenal that turns ordinary meals into memorable experiences. For a deeper dive into its many applications, you might want to read
Transform Your Meals: The Versatile Uses of Compound Butter.
The Simple Science of Superb Herb Butter: Ingredients & Preparation
Crafting exceptional herb butter starts with choosing the right foundation and preparing your ingredients correctly.
Choosing Your Butter
The quality of your butter matters. Start with a good brand of fresh butter, as its creamy taste will be the base of your creation.
*
Unsalted vs. Salted: While either can be used, unsalted butter offers more control over the final seasoning. If you're making herb butter for something like a steak, you might want to add a pinch of flaky sea salt to unsalted butter, or opt for regular salted butter if you know the application will benefit from it. For baking, unsalted is usually preferred.
*
Temperature: The butter must be properly softened to room temperature – not melted. This is crucial for easy mixing and ensures that your herbs and other additions are evenly incorporated without separating. Let it sit out for several hours, or gently soften it in the microwave using 10% power or a dedicated softening function. It should be pliable enough to stir effortlessly.
Selecting and Preparing Your Herbs
Both fresh and dried herbs can be used, each offering distinct advantages.
*
Fresh Herbs: Provide vibrant color, potent aroma, and a crisp, lively flavor. If using fresh herbs, always rinse them thoroughly under cold water. The most important step for fresh herbs is to allow them to air dry completely for several hours (or use a salad spinner) before chopping. Any residual moisture can cause your butter to spoil faster or create an unpleasant texture. For larger leaf herbs like basil, mint, or sage, employing the "chiffonade" technique creates elegant, thin ribbons that distribute beautifully and prevent stringiness. To chiffonade, stack several leaves, roll them tightly like a cigar, and then slice across the roll with a sharp knife.
*
Dried Herbs: Offer convenience and a more concentrated flavor profile, making them excellent for robust dishes where fresh herbs might wilt or lose their potency. Use about one-third the amount of dried herbs compared to fresh.
Beyond Herbs: Aromatic Additions
This is where you can truly personalize your herb butter. Consider incorporating:
*
Garlic: Minced or roasted garlic adds a foundational savory note.
*
Lemon Zest: Brightens and lifts the flavors, especially good with fish or chicken.
*
Shallots or Chives: Offer a milder oniony flavor.
*
Spices: A pinch of smoked paprika, chili flakes, or black pepper can add warmth and depth.
*
Mustard (Dijon): A tiny bit can add tang and emulsify.
As an example of a well-loved combination, Ina Garten's herb butter often features fresh herbs, garlic, and lemon zest, creating a truly versatile and aromatic blend. You can learn more about her approach here:
Ina Garten's Herb Butter: Elevate Dishes with Simple Flavor.
Step-by-Step Guide to Crafting Your Own Herb Butter
Making herb butter is incredibly straightforward. Follow these simple steps for perfect results every time.
- Prepare Your Herbs: If using fresh herbs, rinse them well and ensure they are completely dry. Finely chop them. If using larger leaves, chiffonade them for an elegant cut and even distribution.
- Soften the Butter: Place your chosen butter in a mixing bowl and let it come to room temperature until it’s soft and easily stirrable. Do not melt it.
- Combine Ingredients: Add your chopped herbs (and any other aromatics like minced garlic, lemon zest, or spices) to the softened butter.
- Mix Thoroughly: Using a spatula or spoon, gently but thoroughly mix the ingredients until the herbs are evenly distributed throughout the butter. Avoid overmixing, as this can incorporate too much air.
- Form and Chill: This step is key for presentation and portioning.
- For Logs: Spoon the mixture onto a piece of wax paper or parchment paper (about 6-8 inches wide). Form the butter into a log shape using the paper to help you roll it tightly. Twist the ends of the paper to seal.
- For Molds or Pats: Press the butter into decorative molds, small ramekins, or simply shape it into individual pats with your hands.
Once formed, place the herb butter in the refrigerator for at least 1-2 hours, or until it is firm. This makes it easy to slice and serve.
Unleashing the Flavor: Creative Uses for Your Homemade Herb Butter
Once you have a fresh log of homemade herb butter, the culinary possibilities are endless. Here are just a few ideas to get your imagination flowing:
*
Steak and Meats: A classic pairing. Slice a pat of garlic-herb butter over a hot, grilled steak, chicken breast, or pork chop right after it comes off the heat. It melts beautifully, basting the meat in incredible flavor. For turkey, try tucking pats of sage and thyme butter under the skin before roasting for incredibly moist and flavorful results.
*
Fish and Seafood: Lemon-dill or parsley-chive butter is sublime melted over pan-seared salmon, baked cod, grilled shrimp, or scallops.
*
Vegetables: Toss steamed or roasted vegetables (like green beans, asparagus, carrots, or broccoli) with a dollop of herb butter. It’s fantastic on corn on the cob, stirred into mashed potatoes, or melted over baked potatoes.
*
Breads and Pastas: Spread basil-garlic butter on sliced baguette for instant gourmet garlic bread. It’s also wonderful melted into warm pasta or rice dishes, adding instant richness and aroma.
*
Eggs: Swirl a small amount into scrambled eggs or spread on toast with poached eggs for an elevated breakfast.
*
Soups and Sauces: Stir in a pat of herb butter as a finishing touch to creamy soups or pan sauces for extra body and flavor.
Storage and Longevity
Proper storage ensures your delicious homemade herb butter remains fresh and ready to use.
*
Refrigerator: Herb butter can be stored in the refrigerator for several days, typically up to a week, especially if using fresh herbs. Always keep it in a sealed, airtight container or wrapped tightly in its wax paper log inside a plastic zipper-top bag to prevent it from absorbing other odors.
*
Freezer: For longer storage, herb butter freezes exceptionally well. It can be frozen for up to two months. When freezing a log, wrap it tightly in plastic wrap, then an additional layer of aluminum foil, or place it in a freezer-safe bag. When ready to use, allow it to thaw in the refrigerator for a few hours before slicing or spreading.
Conclusion
Homemade herb butter is a simple yet incredibly powerful culinary tool that every home cook should have in their repertoire. It's easy to make, highly versatile, and instantly elevates a wide array of dishes from ordinary to extraordinary. By starting with quality ingredients, understanding basic preparation, and embracing creativity with flavor combinations, you can unlock a world of delicious possibilities. So, gather your fresh herbs, soften that butter, and get ready to impress yourself and everyone at your table with this flavorful secret weapon!